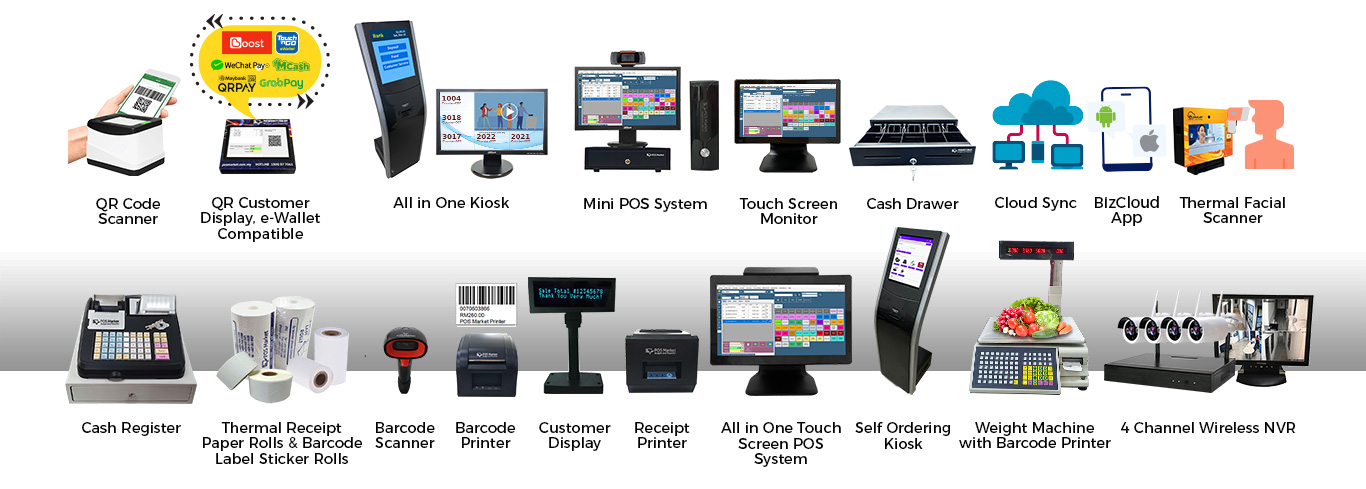
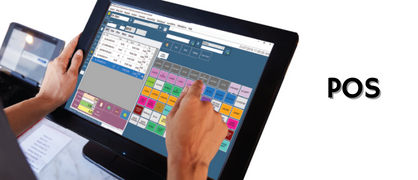
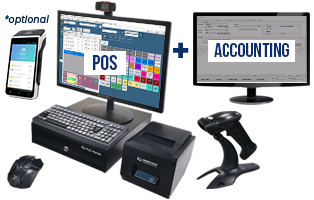
A POS system is a key asset for any business to keep track of sales, inventory, and customers. It allows businesses to quickly process and manage transactions, track customer information, and keep track of inventory and sales.
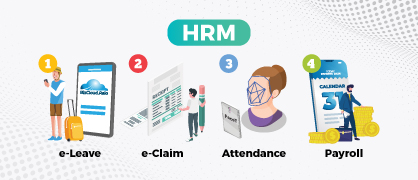
A HRM system is a vital tool for any business. It allows businesses to easily manage employee information, track employee performance, and manage payroll. eleave.my HRM includes e-leave, e-claim, attendance, and payroll.
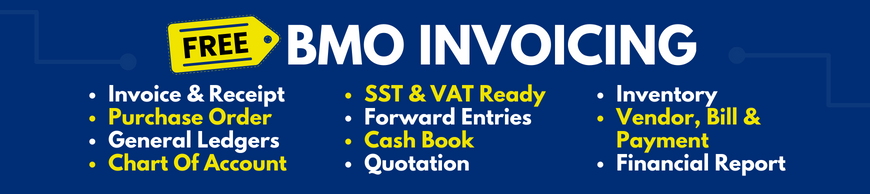
Invoicing is a process that allows businesses to easily send invoices to customers and collect payments. It is important for businesses to have a reliable invoicing system in place in order to ensure timely and accurate payment processing.
There are multiple documents that you can generate with invoicing software, for example:
- Invoices
- Quotations
- Receipts
- Credit Notes
- Statements
- Purchase Orders
- Delivery Notes
|
+ |
|
+ |

|


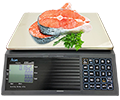
Weight Scale
Pattern Approved Instrument 2020: Approved no. ATS-0008-20 |
QR Order
|
Image Recording
|
Facial Recognition
|
POS Rental
|
F&B Kiosk(Fast Food Store Alike)
|
Price Checker + Video Player
|


Business Management Online (BMO) POS System and Business Suite
- Scalable
- Powerful and Adaptable
- Highly Customizable
- Complete Business Environment
- One Stop Support
- Professional Software Developers
- From 1 station to multiple station. From offline database to cloud-based database. From 1 shop to multiple shops. From Windows to Android apps.
- Automated operations from inventory management, sales, and customer loyalty program.
- Automated reporting with customizable dashboards and analytics to track sales and customer trends.
- Secure payment gateway integration with major credit cards, cash, and check payments.
- Customizable loyalty program and discounts.
- Loyalty points and rewards system.
- Offline or cloud-based data storage and backup.
- Integration with accounting and inventory management software.
- Easy to use and manage.
- Multi-language support.
- BMO POS has multiple modules customized to support your needs, from inventory, membership, commission, sets to canteen solution.
- Create custom invoices and receipts, track sales and payments, manage loyalty programs, and analyze sales data.
- Supports multiple payment gateways, security settings, and inventory tracking.
- Automates customer management, order processing, and accounting functions.
- Has a customizable user interface and is multilingual.
- Has powerful reporting capabilities to analyze trends and measure performance.
- Includes features such as discounts, promotions, and loyalty programs.
- Offers detailed customer service and support.
- Every business is different, our experience has help many types of business to success with the help of our system. The POS system has many options to customized to suit every business. Food and beverages business, retail, optometry, workshops, canteen, shopping complex, and more are able to use our software comfortably.
- Fast, intuitive, and easy-to-use. Our system is designed to be easy and intuitive to use, with a simple and intuitive interface that allows you to quickly process orders, manage stock and customers, and access all of your business data.
- Cloud based, so you can access your data from anywhere. BMO can be on premise or cloud based, meaning you can access your data from anywhere, anytime. You can also use it on multiple devices, making it easy to manage your business no matter where you are.
- Security. BMO is secure, with data encryption and regular security updates to keep your data safe.
- Scalable. BMO is designed to be scalable, meaning you can add more features and functionality as your business grows.
- Automation. BMO's automation features allow you to automate tasks, such as billing and customer management, so you can spend more time focusing on growing your business.
- Reporting. BMO comes with a powerful reporting system, allowing you to quickly generate reports and gain insights into your business.
- Customer support. Our team of experts are available to help you get the most out of BMO and provide technical support when you need it.
The BMO HRM system is designed to streamline and automate the HR processes within an organization. It helps to manage employee information, track attendance, manage payroll, and process employee claims. It also provides a comprehensive set of features such as payroll management, leave management, time and attendance tracking, expense management, and compliance management.
The attendance record can be automatically sync from facial recognition, thumbprint reader or ID card.
The invoicing system is designed to help businesses create, send, and manage invoices, as well as other accounting documents such as quotations, purchase orders, and sales orders. It allows users to easily create invoices and other documents, track payments, and manage customer relationships. Additionally, the system offers customizable templates to make invoicing faster, and allows users to store documents and customer information securely. It also provides detailed financial reporting and analytics to help businesses gain insights into their financial performance.
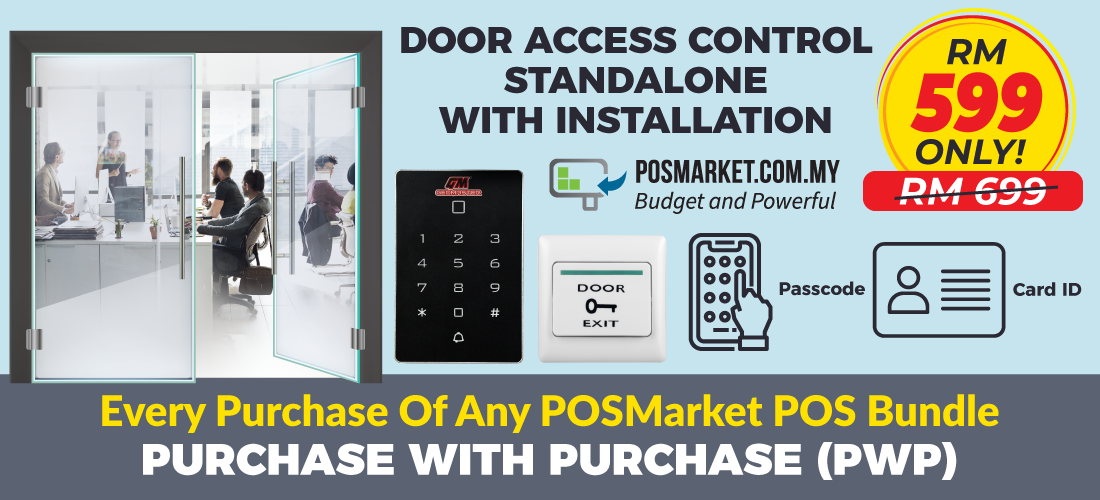
Our team is always available to provide one-stop support for your POS, HRM and Invoicing system. We provide remote access to our support team, so you can get help whenever you need it. We can help you customize your system, train your staff, and scale your business. We also provide technical support for facial recognition door access and conventional door access systems. With our team of knowledgeable and experienced professionals, you can be sure that your system is running smoothly and efficiently.
At BMO, we have a team of professional software developers who are experienced in developing POS, HRM and Invoicing systems. Our team is able to help you with any additional requirements that you may have. With our extensive experience, we can provide tailored solutions for your business. We can also help you with facial recognition door access and conventional door access systems. With our team of experienced professionals, you can be sure that your system is running smoothly and efficiently.
BMO Offline POS System
Reliability:
BMO offline POS system is stable and reliable, ensuring uninterrupted operation even during internet outages or connectivity issues. It can work totally standalone without internet and optionally can sync data to cloud if it is preferred.
Offline Functionality:
The ability to function without an internet connection is vital for on-premises businesses, BMO Offline POS system can continue processing transactions, managing inventory, and generating reports offline. It can work totally standalone.
Speed and Efficiency:
BMO Offline POS system facilitates fast and efficient transactions, minimizing customer waiting times and improving overall operational efficiency.
Inventory Management:
Effective inventory management is essential, BMO Offline POS systems provides real-time inventory tracking, stock alerts, and the ability to generate inventory reports.
Customization:
Businesses have unique requirements, BMO Offline POS system can be tailored to your specific needs, such as customizing menus, pricing, discounts, and promotions.
Reporting and Analytics:
Access to comprehensive sales reports, analytics, and performance insights is valuable to owners, enabling them to make data-driven decisions, identify trends, and optimize business strategies.
Integration with Hardware:
Compatibility with existing hardware, such as barcode scanners, receipt printers, and cash drawers, is important for seamless integration and ease of use.
User-Friendly Interface:
BMO Offline POS is intuitive and user-friendly that is easy to navigate, require minimal training, and allow staff to quickly learn and operate the system efficiently.
Support and Updates:
Adequate customer support, regular software updates, and ongoing system maintenance are crucial factors for owners, ensuring they receive timely assistance and access to new features and improvements.
One-time payment, Cost-effectiveness:
Some business owners prefer a one-time payment model for their offline POS system as it allows them to avoid recurring subscription fees. This can be more cost-effective in the long run, especially for small businesses or those with limited budgets.
No Monthly Commitment:
For businesses with fluctuating sales volumes or seasonal operations, a one-time payment eliminates the obligation of monthly payments, providing greater financial flexibility.
BMO Hybrid POS system (Offline + Cloud)
Data Backup and Security:
Hybrid BMO Offline and Online POS system has the ability to sync data to the cloud, as it provides automatic backups and safeguards against data loss. Online sync provide protection against hardware failures, theft, or other incidents.
Cloud and Offline Functionality:
The hybrid POS system’s ability to work standalone, even without an internet connection, is crucial for business owners. Business can rely on the system to continue processing transactions, managing inventory, and generating reports seamlessly during internet outages or poor connectivity.
Real-Time Data Syncing:
BMO Hybrid POS system offers near real-time data syncing between the cloud and the local system. This ensures that sales, inventory, and other essential information are consistently updated across all devices and locations, providing accurate insights and streamlining business operations.
Flexibility and Scalability:
BMO hybrid POS system can extend to Client and Server, offline or cloud based to adapt to your business’s evolving needs. It has the flexibility to add more devices or locations to the system as your business grows, while still maintaining data synchronization and a seamless user experience.
Centralized Management:
BMO hybrid POS system provides centralized management capabilities when it is sync to the cloud, allowing owners to monitor and control multiple locations or branches from a single interface. This includes accessing real-time sales reports, inventory status, and employee performance metrics across all connected devices.
Android App:
BMO POS system can be accessed by mobile app. The android app assists the user to perform multiple tasks, handle job sheets, take orders, enter vehicle databases, explain to customers and many more.
User-Friendly Interface:
An intuitive and user-friendly interface is essential for business owners and their staff. BMO hybrid POS is easy to navigate, requires minimal training, and allows for efficient order taking, inventory management, and payment processing.
Support and Updates:
Sufficient customer support, consistent software updates, and continuous system maintenance are vital considerations for owners, BMO POS system provide prompt assistance and access to the latest features and enhancements.
Electronic Weight Scale
 |
 |
 |
CERTIFIED SELLER by the MINISTRY OF DOMESTIC TRADE, CO-OPERATIVES & CONSUMERISM (KPDNHEP) |
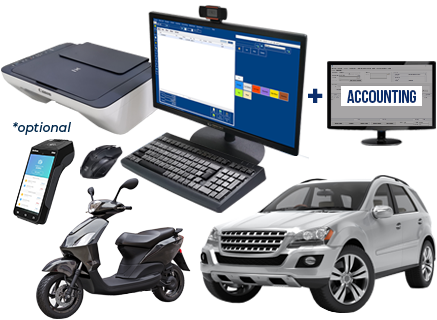
Rent A POS System
Organize your sales events easily without increasing operational costs with our cost management software- Rent-A-POS system deal! You can choose either to rent hardware or software from our bundle!

System Comparison | BMO POS System Bundles |
|||||||||||
|---|---|---|---|---|---|---|---|---|---|---|---|---|
Basic | Mini | FnB | Fresh Market | Beauty Salon | Pharmacy | Optometry | Workshop | POS | Gym | Bookstore | Laundry |
|
 |  |  |  |  |  |  |  |  |  |  |  |
|
| Offline (On Premise) | Y | Y | Y | Y | Y | Y | Y | Y | Y | Y | Y | Y |
| Online (Cloud, Scalable) | Y | Y | Y | Y | Y | Y | Y | Y | Y | Y | Y | Y |
System Comparison | BMO POS System Bundles |
|||||||||||
|---|---|---|---|---|---|---|---|---|---|---|---|---|
Basic | Mini | FnB | Fresh Market | Beauty Salon | Pharmacy | Optometry | Workshop | POS | Gym | Bookstore | Laundry |
|
| | | | | | | | | | | |
|
| Offline (On Premise) | Y | Y | Y | Y | Y | Y | Y | Y | Y | Y | Y | Y |
| Online (Cloud, Scalable) | Y | Y | Y | Y | Y | Y | Y | Y | Y | Y | Y | Y |
| CPU | Recon | New i5 / i7 | New i5 / i7 | New i5 / i7 | New i5 / i7 | New i5 / i7 | New i5 / i7 | New i5 / i7 | New i5 / i7 | New i5 / i7 | New i5 / i7 | Recon |
| Monitor | 21.5 inches | 21.5 inches | 15.6 inches Touch Screen | 21.5 inches | 21.5 inches | 21.5 inches | 21.5 inches | 21.5 inches | 21.5 inches | 21.5 inches | 21.5 inches | 21.5 inches |
| Cash Drawer | Mini (Beautiful) | Mini (Beautiful) | Mini (Beautiful) | Mini (Beautiful) | Mini (Beautiful) | Mini (Beautiful) | Mini (Beautiful) | Mini (Beautiful) | Mini (Beautiful) | Mini (Beautiful) | Mini (Beautiful) | |
| Laser Barcode Scanner | Y | Y | Y | Y | Y | Y | Y | Y | Y | Y | Y | |
| Multi Receipt Printer Support | Y | Y | Y | Y | Y | Y | Y | Y | Y | Y | Y | |
| A4 Printer | Y | |||||||||||
| Keyboard | Y | Y | Y | Y | Y | Y | Y | Y | Y | Y | Y | Y |
| Mouse | Y | Y | Y | Y | Y | Y | Y | Y | Y | Y | Y | Y |
| Paper Roll | 10 rolls FOC | 10 rolls FOC | 10 rolls FOC | 10 rolls FOC | 10 rolls FOC | 10 rolls FOC | 10 rolls FOC | 10 rolls FOC | 10 rolls FOC | 10 rolls FOC | 10 rolls FOC | 10 rolls FOC |
| Price Checker | Optional | Optional | Optional | Optional | Optional | Optional | Optional | Optional | Optional | Optional | Optional | Optional |
| QR Ordering | Optional | Optional | Optional | Optional | Optional | Optional | Optional | Optional | Optional | Optional | Optional | Optional |
| Customer Diagnostic History | Optional | Optional | Optional | Optional | Optional | Optional | Y | Y | Y | Optional | Optional | Optional |
| Employee Commission | Optional | Optional | Optional | Optional | Y | Optional | Optional | Optional | Optional | Optional | Optional | Optional |
| Membership | Optional | Optional | Optional | Optional | Optional | Optional | Optional | Optional | Optional | Optional | Optional | Optional |
| Web Cam Recording | Y | Y | Y | Y | Y | Y | Y | Y | Y | Y | Y | Y |
| Weight Scale | Optional | Optional | Optional | Y | Optional | Optional | Optional | Optional | Optional | Optional | Optional | Optional |
| Inventory Control | Y | Y | Y | Y | Y | Y | Y | Y | Y | Y | Y | Y |
| E-wallet QR Payment Terminal | Optional | Optional | Optional | Optional | Optional | Optional | Optional | Optional | Optional | Optional | Optional | Optional |
| Invoicing Module | Optional | Optional | Optional | Optional | Optional | Optional | Optional | Optional | Y | Optional | Optional | Optional |
| Optional Features + Modules (Scalable Anytime) | Optional | Optional | Optional | Optional | Optional | Optional | Optional | Optional | Optional | Optional | Optional | Optional |
| Able to Work with Multiple Stations | Optional | Optional | Optional | Optional | Optional | Optional | Optional | Optional | Optional | Optional | Optional | Optional |
| Vehicle Database | Optional | Optional | Optional | Optional | Optional | Optional | Optional | Y | Y | Optional | Optional | Optional |
| Free 3 Years Support | Y | Y | Y | Y | Y | Y | Y | Y | Y | Y | Y | Y |
| Free 6 Months Cloud | Y | Y | Y | Y | Y | Y | Y | Y | Y | Y | Y | Y |
| Free Gift | Y | Y | Y | Y | Y | Y | Y | Y | Y | Y | Y | Y |
| Package Price | RM2399.00 | RM2999.00 (i5) RM3999.00 (i7) | RM2999.00 (Basic) RM3499.00 (Standard) RM3999.00 (AIO) | RM3899.00 (Basic) RM4499.00 (Standard) | RM2999.00 | RM2999.00 | RM3299.00 | RM2999.00 | RM2999.00 | RM3099.00 | RM3199.00 | RM2599.00 (Basic) |
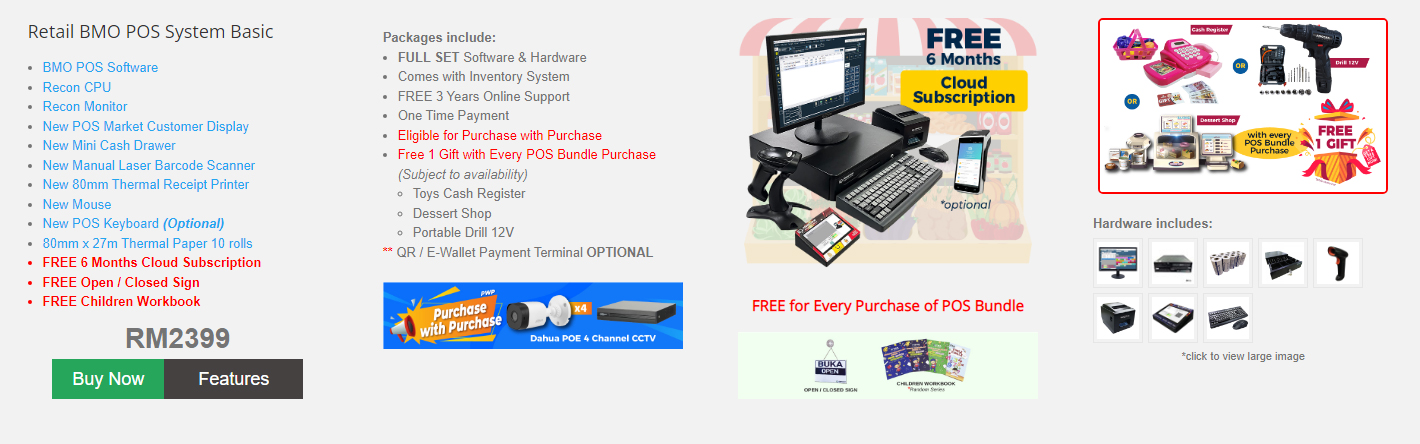
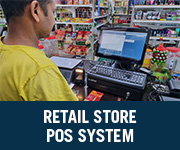
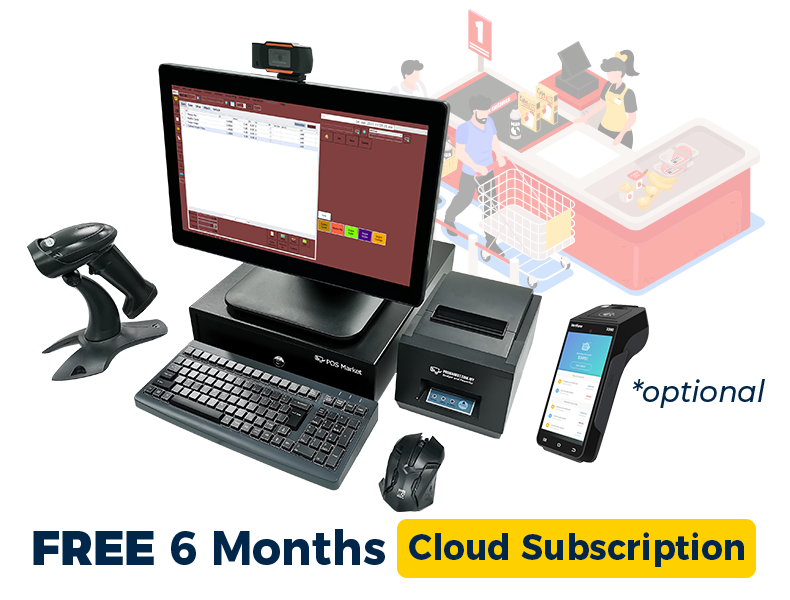
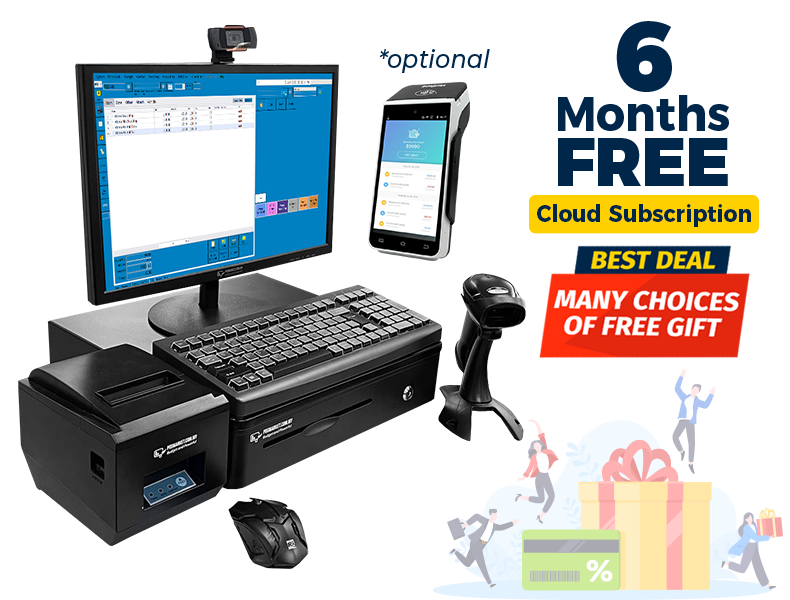
Retail BMO POS System Basic
The best POS system for your retail store with functions that will help your business grow.
Software
- BMO POS Software
- BMO Accounting Software
- BMO Inventory Software
Payment
- One Time Payment
- Credit Card Installment
- No Monthly Charges Without Cloud
Free Accessories (while stocks last)
- 80mmX27m Thermal Paper 10rolls
- 6 Months Cloud Subscription
- Open / Closed Sign
- Children Workbook
- 3 Years Online Support
Eligible for Purchase with Purchase
Contact Us for Customization
Complimentary
Pick 1 from below (subject to availability):
- Toys Cash Register
- Dessert Shop Toy
- Portable Drill 12V
** QR / E-Wallet Payment Terminal (Optional)
Mini BMO POS System
The best and powerful mini PC POS to save a significant amount of space. This is designed to adapt to your business needs.
Software
- BMO POS Software
- BMO Accounting Software
- BMO Inventory Software
Payment
- One Time Payment
- Credit Card Installment
- No Monthly Charges Without Cloud
Free Accessories (while stock last)
- 80mmX27m Thermal Paper 10rolls
- 6 Months Cloud Subscription
- Open / Closed Sign
- Children Workbook
- POSMarket Webcam
- 3 Years Online Support
Eligible for Purchase with Purchase
Upgrade to Full HD Touch Screen +RM550
Contact Us for Customization
Complimentary
Pick 1 from below (subject to availability):
- Toys Cash Register
- Dessert Shop Toy
- Portable Drill 12V
** QR / E-Wallet Payment Terminal (Optional)
GET A FREE GIFT NOW!
Free 1 Gift with Every POS Bundle Purchase
(Subject to Availability)

Cash Register
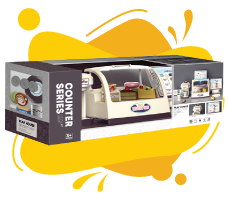
Dessert Shop
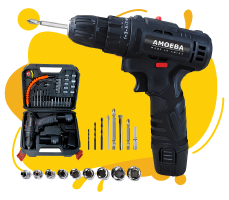
Portable Drill 12V
FREE for POS Bundle Purchase


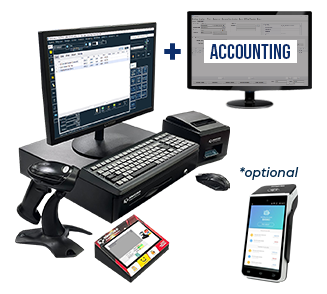
BMO POS Accounting System
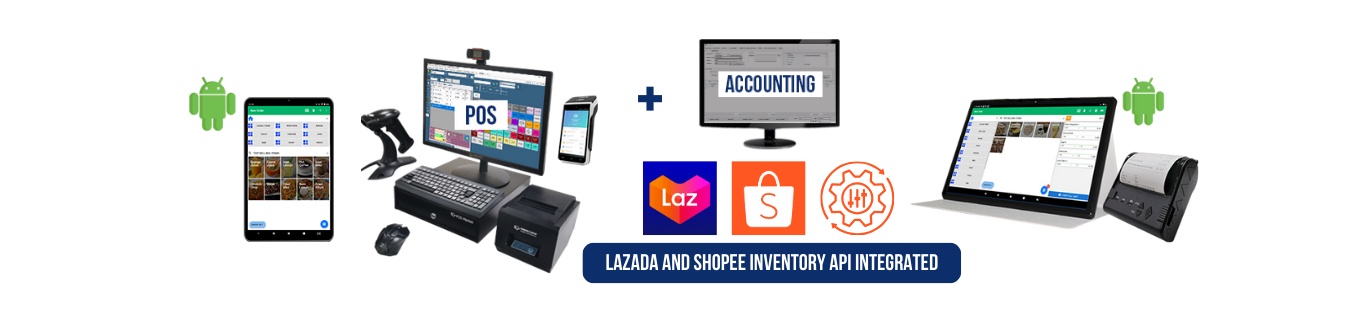
BMO POS Accounting can import and export from SQL accounting software.
Features
- BMO POS Software
- BMO Accounting Software
Hardware
Free Accessories
(while stock last)
- 80mmX27m Thermal Paper 10rolls
- 6 Months Cloud Subscription
- Open / Closed Sign
- Children Workbook
- 3 Years Online Support
Upgrades
- Full HD Touch Screen +RM550
- View Purchase with Purchase
Contact Us for Customization
Payment
- One Time Payment
- No Monthly Charges Without Cloud
Gifts
Pick 1 from below (subject to availability):
- Toys Cash Register
- Dessert Shop Toy
- Portable Drill 12V
** QR / E-Wallet Payment Terminal (Optional)
RM 2999
FULL SET
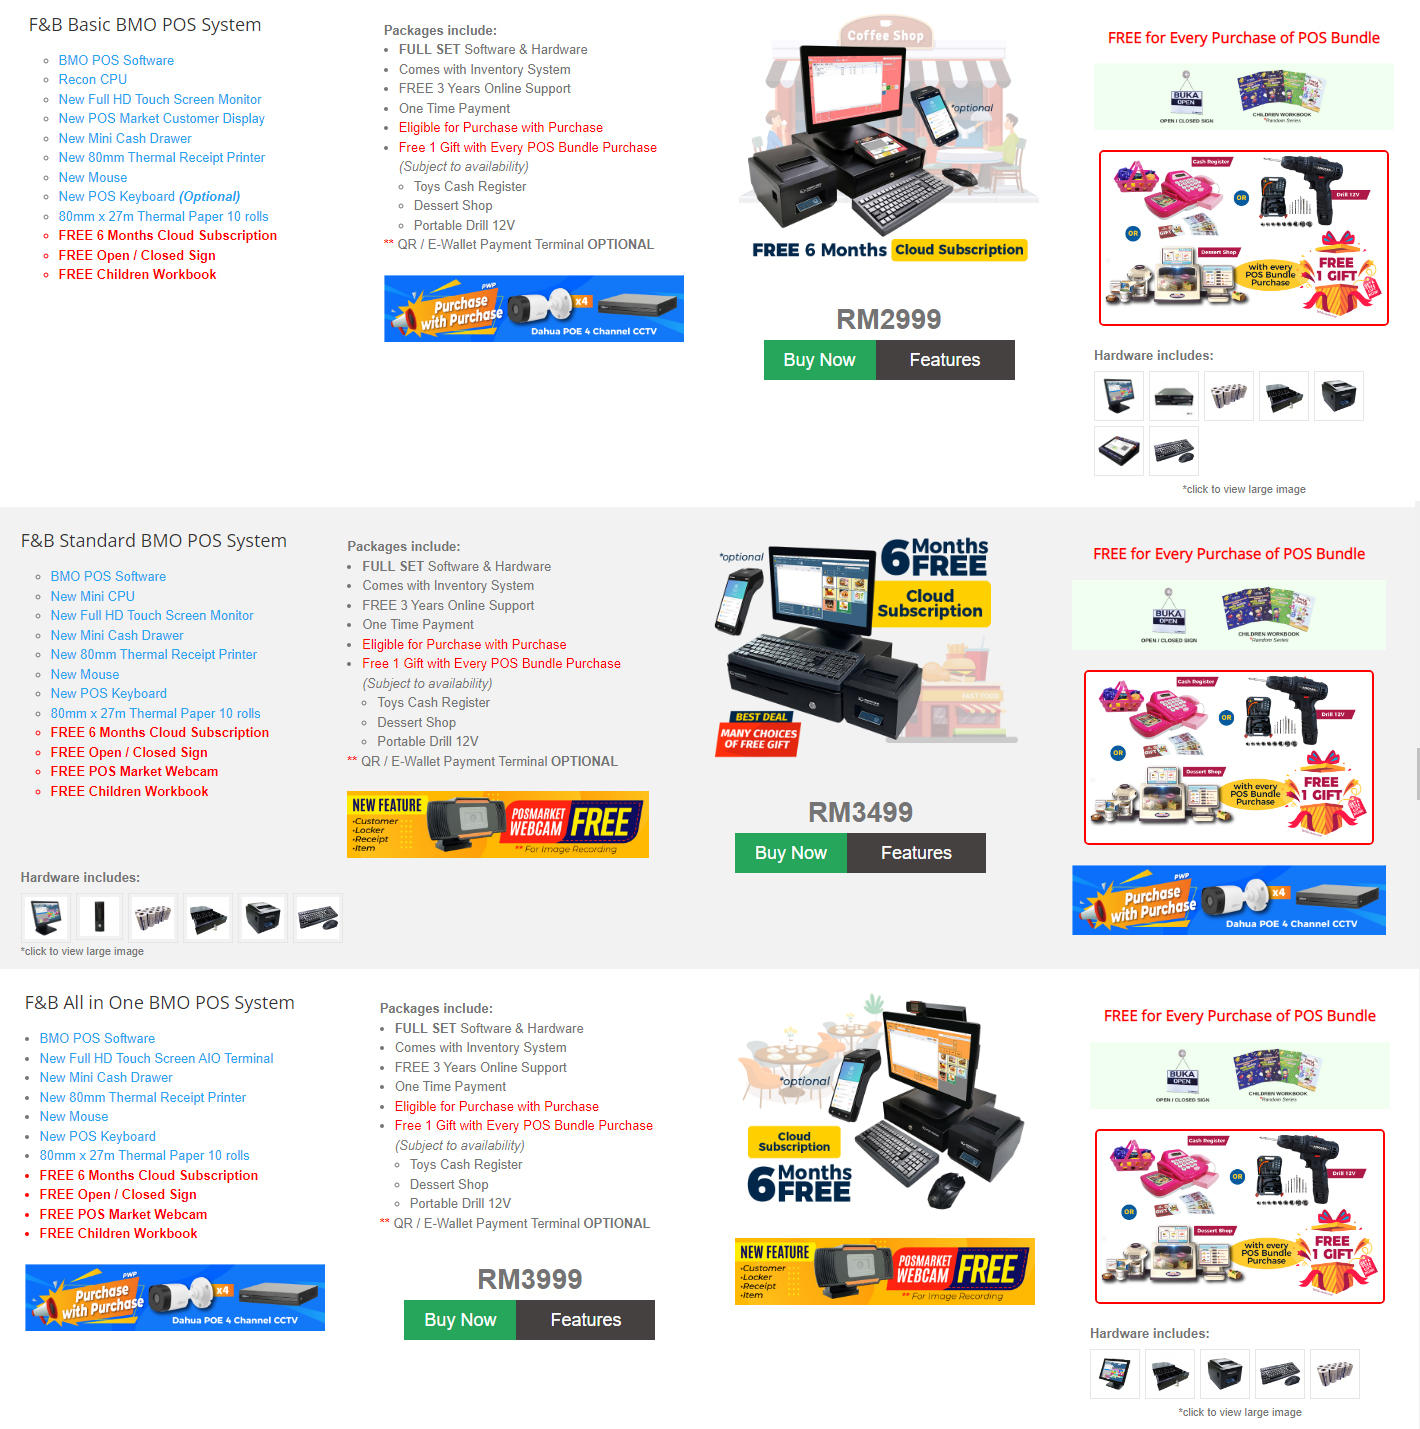
F&B BMO Point of Sales
Advanced cafe and restaurant POS system to help you manage staff, customers, inventory stock, and profit easily. BMO F&B POS System can easily configure to suit most restaurant environments.
Software
- BMO POS Software
- BMO Accounting Software
- BMO Inventory Software
- Optional QR Ordering System
Payment
- One Time Payment
- Credit Card Installment
- No Monthly Charges Without Cloud
Free Accessories
(while stock last)
- 80mmX27m Thermal Paper 10rolls
- 6 Months Cloud Subscription
- Open / Closed Sign
- Children Workbook
- POSMarket Webcam
- 3 Years Online Support
Contact Us for Customization
Eligible for Purchase with Purchase
Complimentary
Pick 1 from below (subject to availability):
- Toys Cash Register
- Dessert Shop Toy
- Portable Drill 12V
** QR / E-Wallet Payment Terminal (Optional)

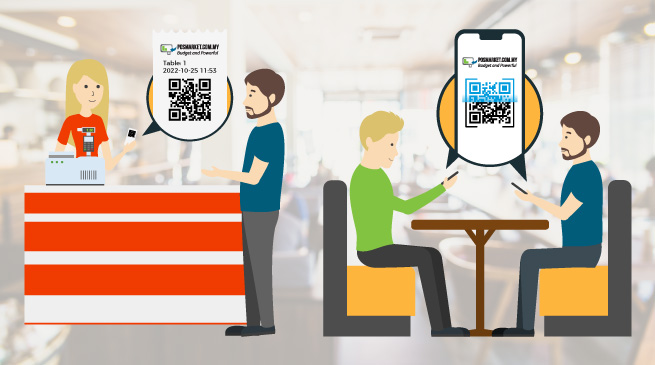
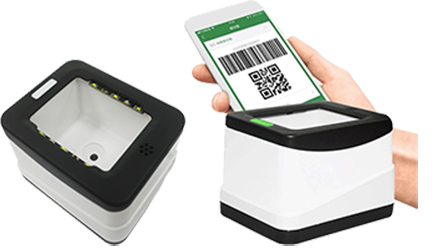
BMO POS QR Ordering for F&B Industry
Do you want to enhance the customer dine-in experience with self-ordering and payment with QR Code Ordering? Now you can save time and money for your cafe or restaurant with POSMarket QR Ordering! Customers no longer have to wait for the menu or their bill/change. They can order it all themselves, using only their mobile phones!
POSMarket QR Ordering is a contactless QR Ordering System for F&B outlets. QR Code Ordering System reduces waiting time, simplifies the ordering process, and increases tables turnover rate.
Android Complementary Ordering System
Android Complementary Ordering System is a mobile food ordering mobile app specially designed to speed up your restaurant operations and increases your restaurant efficiency.
Add On RM 1000
![]()
Complement to F&B BMO POS System


BMO Kiosk Ordering System
POSMarket Kiosk helps businesses create everyday use self-service solutions. POSMarket Kiosk enables users to make purchases in-store without the help of any store staff. POSMarket Kiosk is designed to work in multiple scenarios such as Food Court, F&B restaurants, and Tabletop Order.
Best for Full-Fledge POS System
“With its different features, industries, hardware, services, and software, POSMarket is a leading POS provider, making their product one of the best POS systems in Malaysia.”
Recommended by: TrustedMalaysia.com
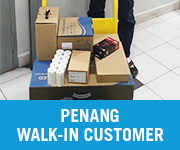
Success Stories
 April 2024
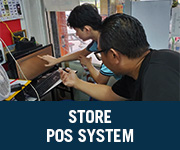 April 2024
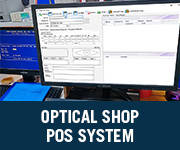 April 2024
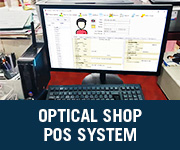 March 2024
BMO POS Customers Walk In
 December 2023
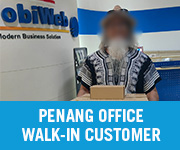 September 2023
 April 2023
 April 2023
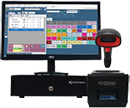
QR Code and 1D/ 2D Barcode Scanner Reader
Scanners are a core component in every scanning and tracking application. Barcode scanner system is a cost-effective tool that can help your business improve its overall operations. Our new POSMarket QR code & barcode scanner USB Port Mobile Payment Box has very large reading windows and quickly identifies the 1D/2D code. With the ability of a barcode scanner to read from any surface, you can streamline previous processes while reducing the amount of paperwork and printing involved.
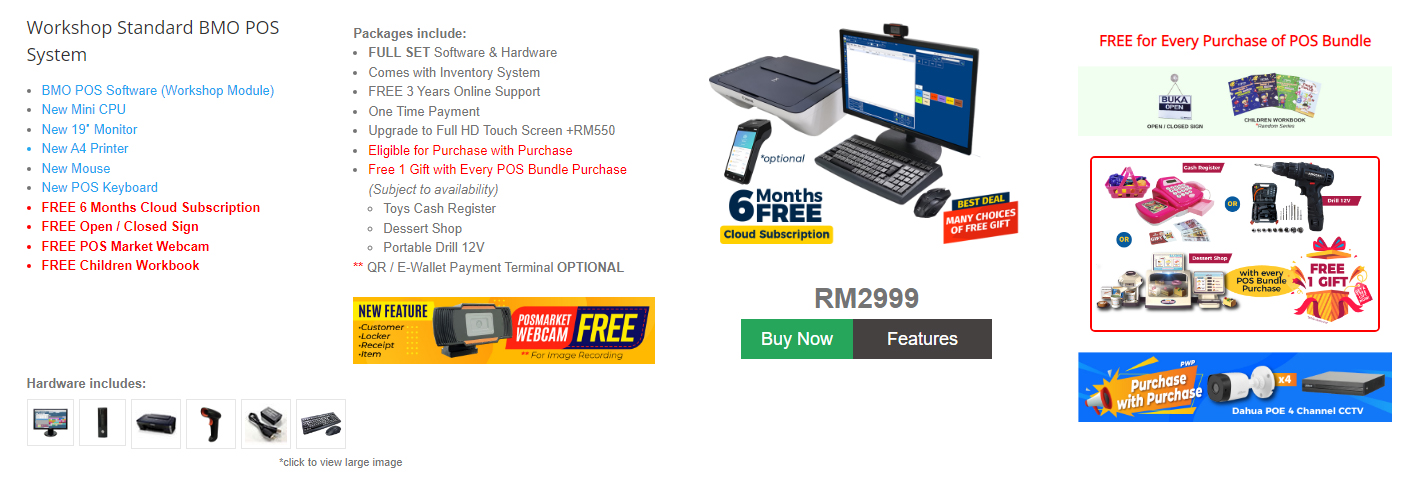
Workshop BMO POS Invoicing
BMO POS System is packed with features specifically designed for car and motorcycle workshops. Our POS System includes useful functions such as ‘vehicle service history’ and ‘stock control’ that helps workshop owners to keep customer’s vehicle information, schedule important car maintenance reminders, and manage their vehicle spare parts inventory accurately.
Software
- BMO POS Software (Workshop Module)
- BMO Accounting Software
- BMO Inventory Software
- Vehicle Database System
Payment
- One Time Payment
- Credit Card Installment
- No Monthly Charges Without Cloud
Hardware
Eligible for Purchase with Purchase
Free Accessories
(while stock last)
- 6 Months Cloud Subscription
- Open / Closed Sign
- Children Workbook
- POSMarket Webcam
- 3 Years Online Support
Contact Us for Customization
Complimentary
Pick 1 from below (subject to availability):
- Toys Cash Register
- Dessert Shop Toy
- Portable Drill 12V
** QR / E-Wallet Payment Terminal (Optional)
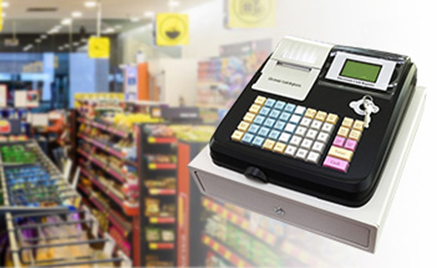
Electronic Cash Register
The perfect blend of form and function! This versatile electronic cash register offers high-performance features in a stylish, compact body. It uses a 58mm thermal line dot printer movement and 8 lines LED digital. Ideal for retail formats ranging from small kiosks to large food courts. As well as being easy to operate, it has an arranged operator display and preset text keys, making it perfect for tackling the demands of everyday business.
RM 699
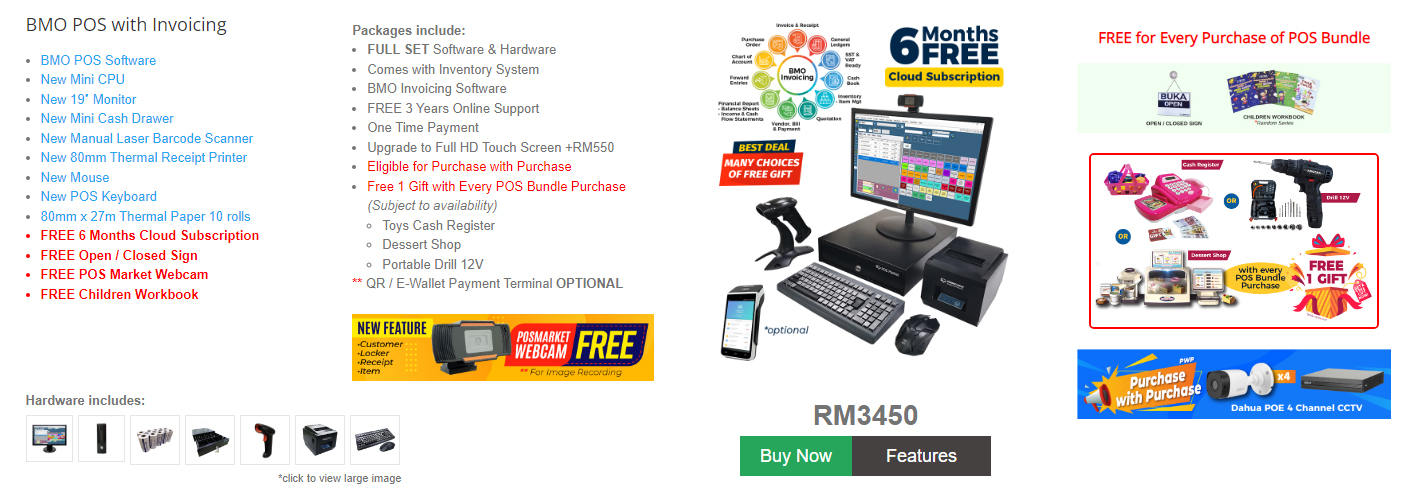
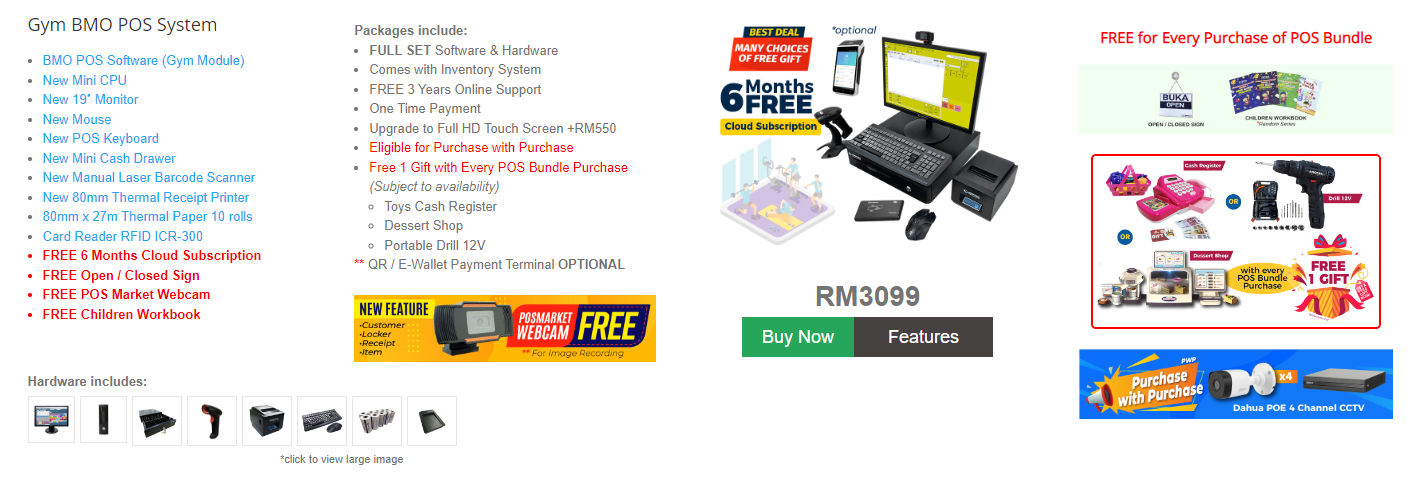
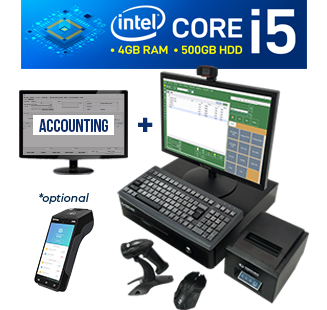
General BMO POS System
The only POS system you will need to run your business successfully while you increase profits and reduce costs! Our POS System is suitable for institutions, senior housing, recreational parks, clubs, cleaners, lodging, and many more.
- New 80mm Thermal Receipt Printer
- 80mm x 27m Thermal Paper 10 rolls
- FREE 6 Months Cloud Subscription
- FREE BMO Invoicing
- FREE Open / Closed Sign
- FREE POSMarket Webcam
- FREE Children Workbook
From RM 3999
Price not inclusive of setup and installation charges.

FREE for Every Purchase of POS Bundle

Package includes:
- FULL SET Software & Hardware
- Comes with inventory system
- FREE 3 Years Online Support
- One Time Payment
- Eligible for Purchase with Purchase
- Free 1 Gift with Every POS Bundle Purchase (Subject to availability)
- Toys Cash Register
- Dessert Shop
- Portable Drill 12V
SQL Accounting Software
Make your enterprise pos system and business practices even more easier with our Accounting software POS system Malaysia that links all important business transaction documents and inventory to your SQL accounting software with POS Software.
RM 1499
Price for SQL Accounting Software only.
- GL (General Ledger)
- Customer (AR)
- Supplier (AP)
- Additional Features
- Sales Modules
- Purchase Modules
* Optional Modules
- Sales & Purchase *
- SQL Inventory *
- Stock Document Listing
- Stock Reorder Advice
- Stock Card
- Stock Month End Balance
- Stock Aging
- Stock Analysis by Documents

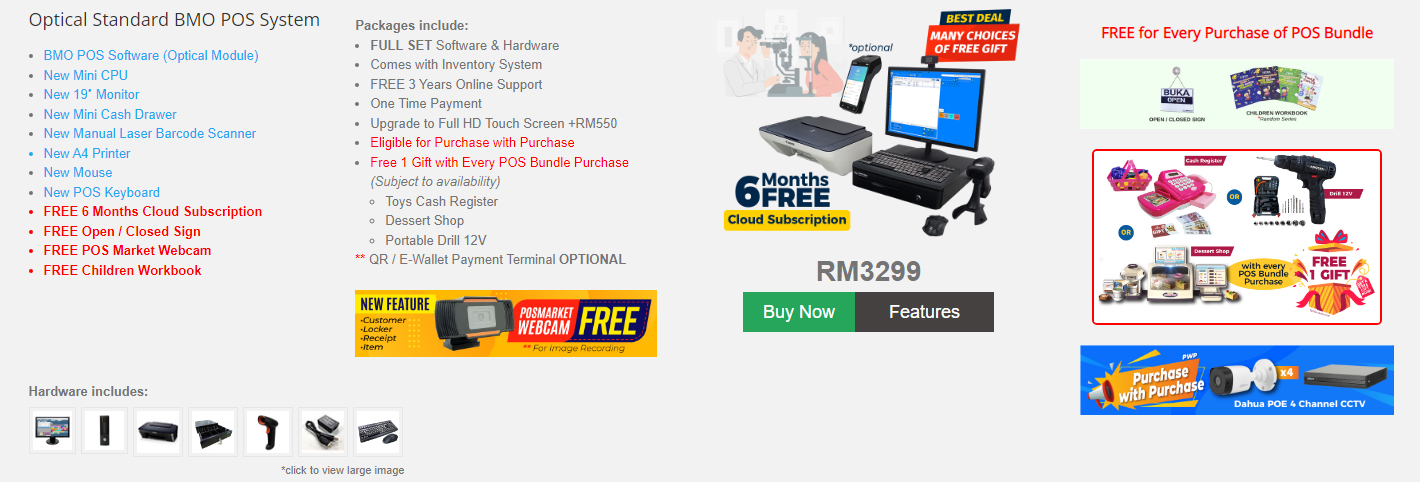
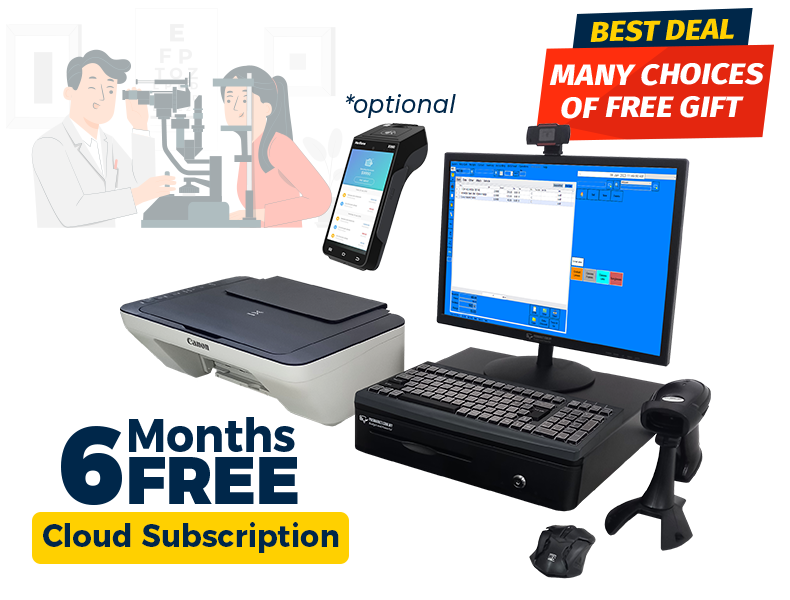
Optical Shop Management System
Features like ‘eye prescription record’, ‘pickup date’, and ‘warranty date’ alerts help business owners to run the shop easily and systematically, saving time and being consistent with customers through sales records and job sheet records.
- New Wired Laser Barcode Scanner
- New A4 Printer
- FREE 6 Months Cloud Subscription
- FREE BMO Invoicing
- FREE Open / Closed Sign
- FREE POSMarket Webcam
- FREE Children Workbook
From RM 3299
Price not inclusive of setup and installation charges.
FREE for Every Purchase of POS Bundle
Package includes:
- FULL SET Software & Hardware
- Comes with inventory system
- FREE 3 Years Online Support
- One Time Payment
- Upgrade to Full HD Touch Screen +RM550
- Eligible for Purchase with Purchase
- Free 1 Gift with Every POS Bundle Purchase (Subject to availability)
- Toys Cash Register
- Dessert Shop
- Portable Drill 12V
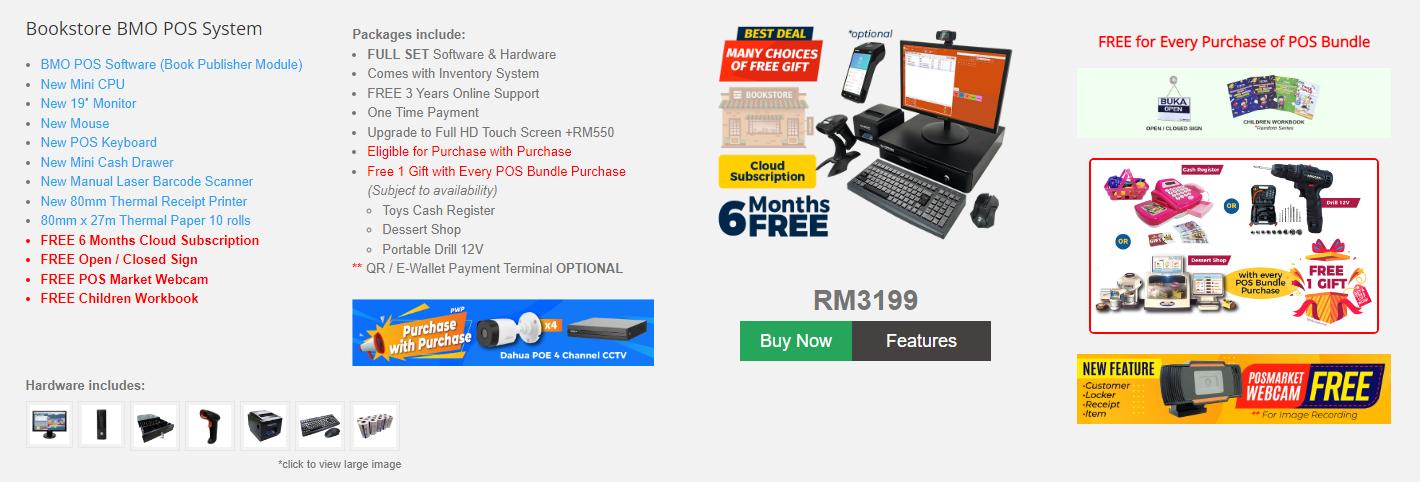
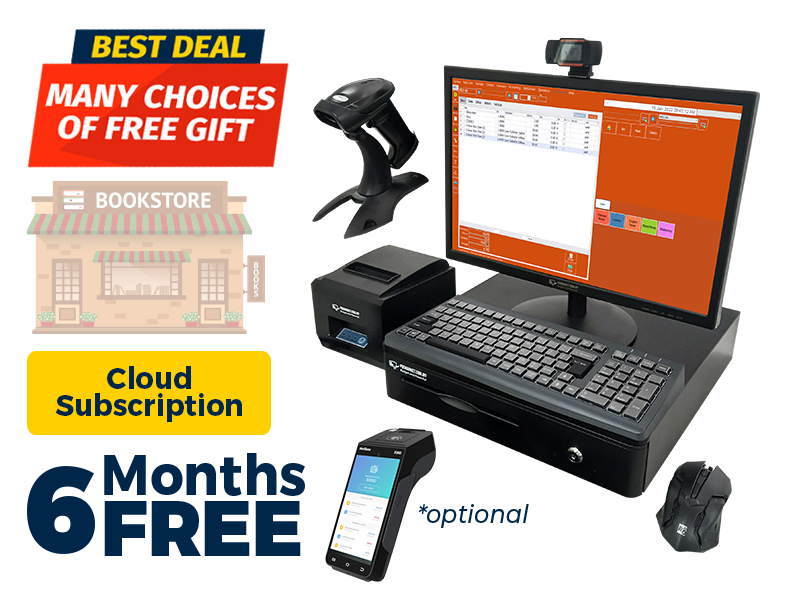
BMO POS for Bookstore
Our BMO POS for Bookstore was specially created for all types of the bookstore to operate the daily business routine.
- New 80mm Thermal Receipt Printer
- 80mm x 27m Thermal Paper 10 rolls
- FREE 6 Months Cloud Subscription
- FREE BMO Invoicing
- FREE Open / Closed Sign
- FREE POSMarket Webcam
- FREE Children Workbook
From RM 3199
Price not inclusive of setup and installation charges.
FREE for Every Purchase of POS Bundle
Package includes:
- FULL SET Software & Hardware
- Comes with inventory system
- FREE 3 Years Online Support
- One Time Payment
- Upgrade to Full HD Touch Screen +RM550
- Eligible for Purchase with Purchase
- Free 1 Gift with Every POS Bundle Purchase (Subject to availability)
- Toys Cash Register
- Dessert Shop
- Portable Drill 12V
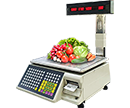
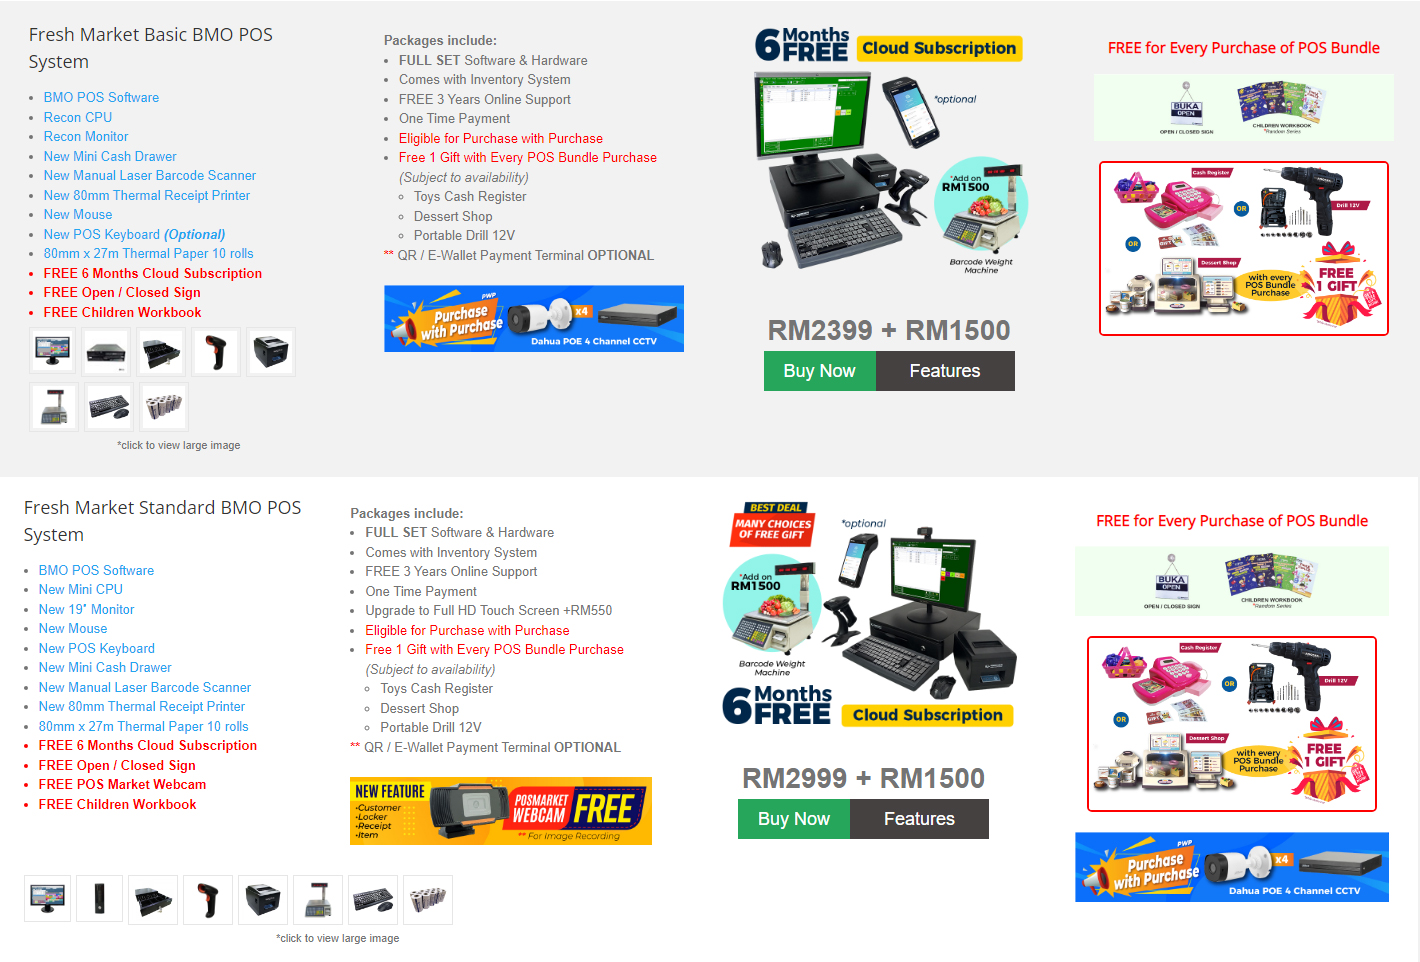
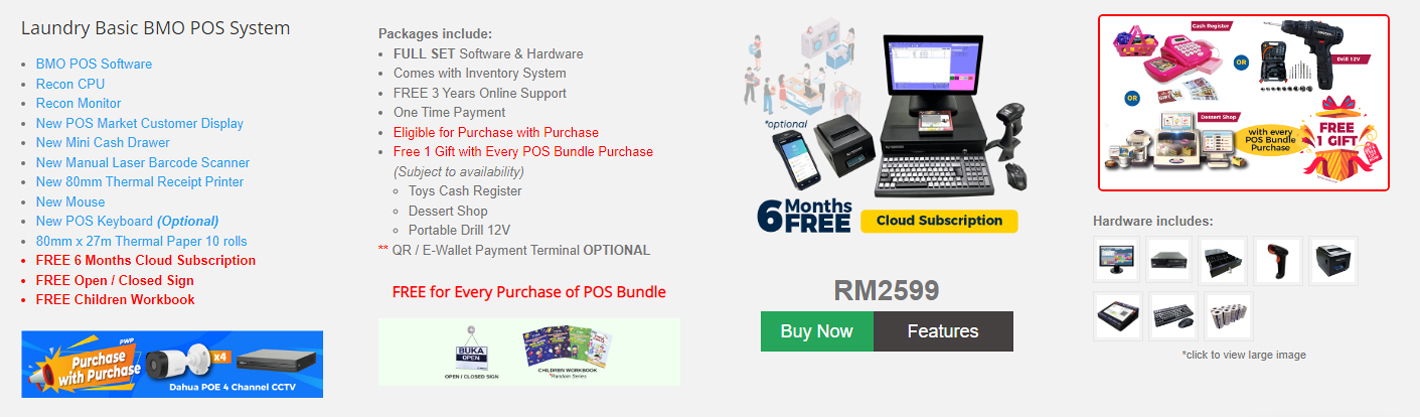
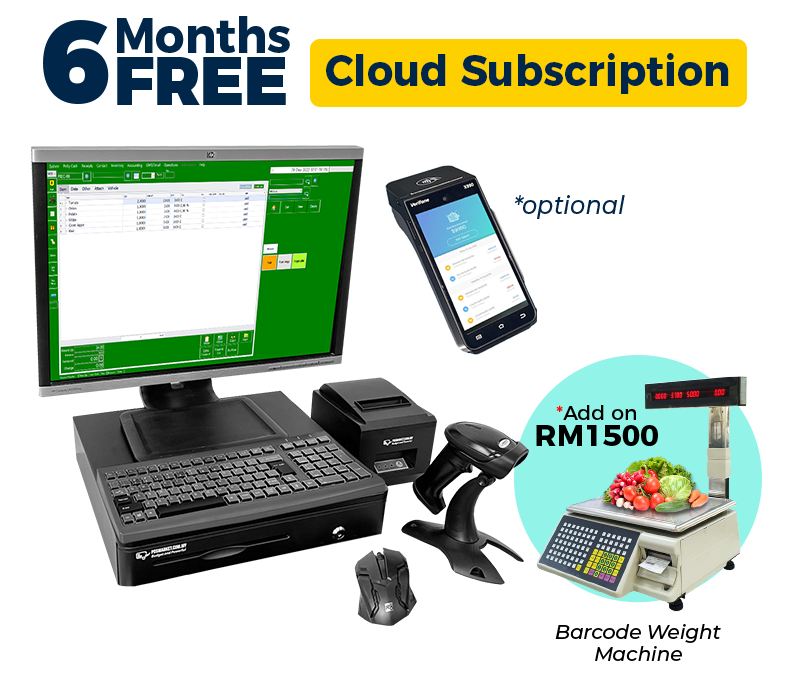
Fresh Market BMO POS System
The Fresh Market BMO POS System is perfect when customers select products that need to be billed according to the weight.
- BMO POS Software
- Recon CPU
- Recon Monitor
- New Mouse
- New POS Keyboard (Optional)
- New Mini Cash Drawer
- New Wired Laser Barcode Scanner
- New 80mm Thermal Receipt Printer
- 80mm x 27m Thermal Paper 10 rolls
- FREE 6 Months Cloud Subscription
- FREE BMO Invoicing
- FREE Open / Closed Sign
- FREE Children Workbook
Price not inclusive of setup and installation charges.
FREE for Every Purchase of POS Bundle
Package includes:
- FULL SET Software & Hardware
- Comes with inventory system
- FREE 3 Years Online Support
- One Time Payment
- Eligible for Purchase with Purchase
- Free 1 Gift with Every POS Bundle Purchase (Subject to availability)
- Toys Cash Register
- Dessert Shop
- Portable Drill 12V
BMO POS with Membership System
Excel in managing your customer loyalty, multiple branches, discounts, or membership system.
- New 80mm Thermal Receipt Printer
- 80mm x 27m Thermal Paper 10 rolls
- FREE 6 Months Cloud Subscription
- FREE BMO Invoicing
- FREE Open / Closed Sign
- FREE POSMarket Webcam
- FREE Children Workbook
From RM 3199
Price not inclusive of setup and installation charges.
FREE for Every Purchase of POS Bundle
Package includes:
- FULL SET Software & Hardware
- Comes with inventory system
- FREE 3 Years Online Support
- One Time Payment
- Upgrade to Full HD Touch Screen +RM550
- Eligible for Purchase with Purchase
- Free 1 Gift with Every POS Bundle Purchase (Subject to availability)
- Toys Cash Register
- Dessert Shop
- Portable Drill 12V
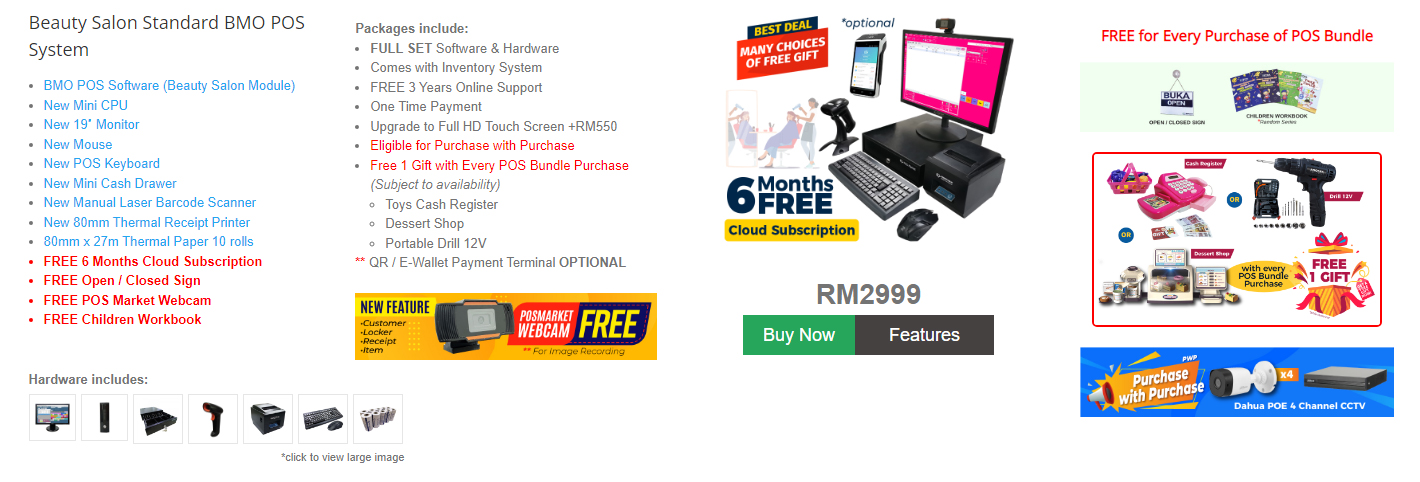
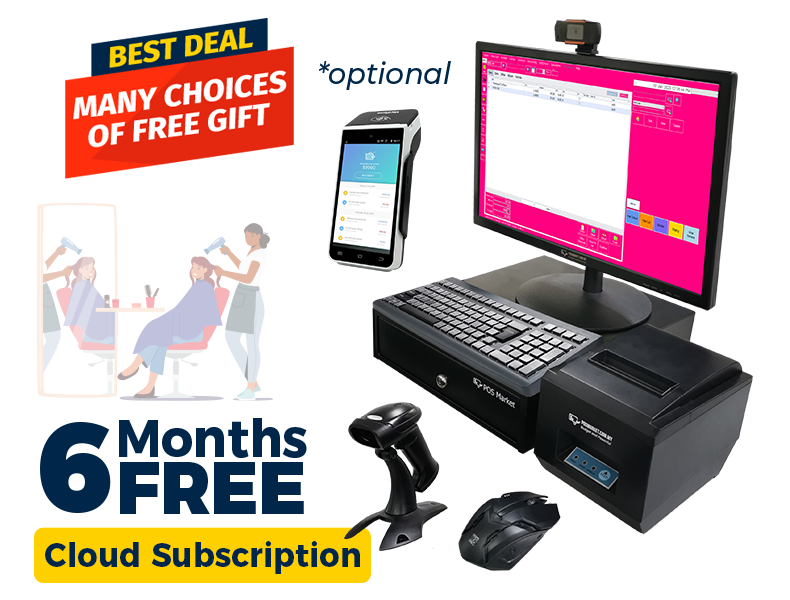
Beauty Salon BMO POS System
Our Beauty BMO POS System is a carefully designed POS system that supports spa POS transaction records while allowing for salon appointment deposits and salon booking prepayment for a better pricing deal for long term clients.
- New 80mm Thermal Receipt Printer
- 80mm x 27m Thermal Paper 10 rolls
- FREE 6 Months Cloud Subscription
- FREE BMO Invoicing
- FREE Open / Closed Sign
- FREE POSMarket Webcam
- FREE Children Workbook
From RM 2999
Price not inclusive of setup and installation charges.
FREE for Every Purchase of POS Bundle
Package includes:
- FULL SET Software & Hardware
- Comes with inventory system
- FREE 3 Years Online Support
- One Time Payment
- Upgrade to Full HD Touch Screen +RM550
- Eligible for Purchase with Purchase
- Free 1 Gift with Every POS Bundle Purchase (Subject to availability)
- Toys Cash Register
- Dessert Shop
- Portable Drill 12V
Real-time Inventory
Real-time inventory with the POS software helps you manage your stock better, understand the products that are in demand and order ahead as well as plan for sales and promotions for products that are slow-moving.

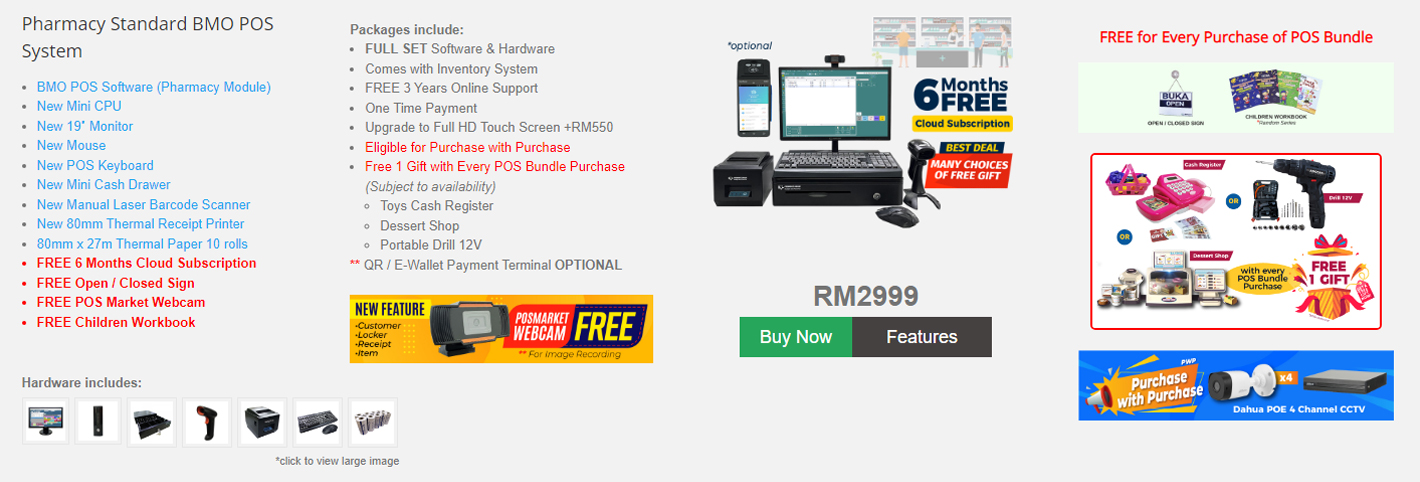
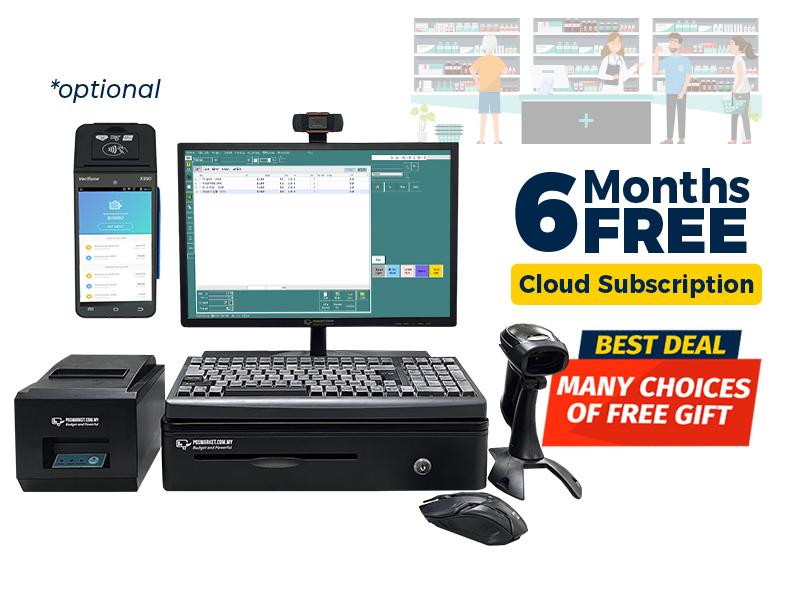
BMO POS for Pharmacy
This full set POS system will run perfectly and best suite for the Pharmacy store. Pharmacy BMO POS System work with you to grow your business, in control of the operation, monitor sales and inventory to provide customer care while meeting government regulations.
- New 80mm Thermal Receipt Printer
- 80mm x 27m Thermal Paper 10 rolls
- FREE 6 Months Cloud Subscription
- FREE BMO Invoicing
- FREE Open / Closed Sign
- FREE POSMarket Webcam
- FREE Children Workbook
From RM 2999
Price not inclusive of setup and installation charges.
FREE for Every Purchase of POS Bundle
Package includes:
- FULL SET Software & Hardware
- Comes with inventory system
- FREE 3 Years Online Support
- One Time Payment
- Upgrade to Full HD Touch Screen +RM550
- Eligible for Purchase with Purchase
- Free 1 Gift with Every POS Bundle Purchase (Subject to availability)
- Toys Cash Register
- Dessert Shop
- Portable Drill 12V
Hypermarket System FTP Upload
Manage your daily operations systematically through our retail store and F&B POS systems. Our POS System will generate reports for the mall management to automatically upload to the mall’s ERP system server.

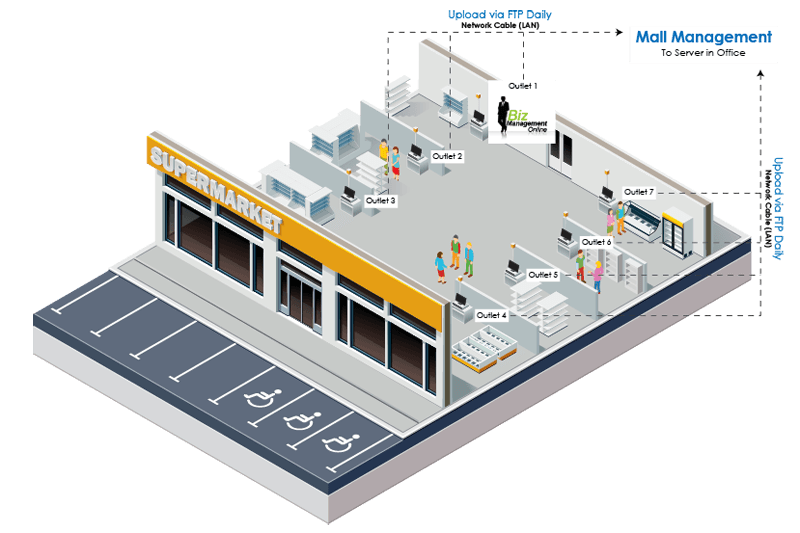
Click image above to view daily operational flow
Your mall is not listed here? Contact us!
- Queensbay Mall
- Design Village
- NU Sentral
- Gateway@KLIA2
- 898 Mall Sdn Bhd
- Paradigm Mall
- Dpulze Mall
- Atria Mall
- USJ City Mall
- Melawati Mall
- KSL City Mall
- Intermark Mall
- IOI Mall
- Decentrum Mall
- Plaza Pelangi
- Capital Land – The Mines
- Sunway Putra Mall
- Gurney Plaza
- Encorp Strand Mall Lounge
- Far East Organization
- Sungei Wang Plaza
- Tropicana City Mall
- Mid Valley Mega Mall
- Cheras Leisure Mall
- The Quill City Mall
- Kompleks Keramat Mall
- Sunshine Bertam Shopping Mall
- 1 Utama Shopping Centre
- Sunway Pyramid Shopping Mall
- and many more!
Generate Business Documents with POSMarket
Our point of sales system allows you to generate customized business documents with your company brand easily. After generating the business documents you can print the documents out with our portable thermal printer Malaysia.
- Invoices A4
- Receipts A4/80mm/58mm
- Statement of Account
- Multiple Reports
- Purchase Order
- Quotation

- POS System Cloud & Offline
- Multiple Stations & Multiple Branches (Multi-store) POS
- POS System One-time Off VS Cloud Subscription
- Why BMO POS System?
Full offline hardware and software for the point of sale. This setup is supported by all of our POS System packages. The best price and free online support for 3 years. When you sign up for Global POS System, you don't have to do anything. You own the license to use the Global POS System on that computer.
Hybrid POS system setup is a special feature of our POS system that lets you use the POS software offline like you normally would. When you're connected to the internet, BMO's POS online solution will sync to the cloud. You sign in to the cloud to see reports, change prices, inventory, and do other things. Then, the data is synchronized.
The second option is to set up a virtual private network (VPN) for each store and share the server that is hosted at the headquarters. This setup gets rid of the cloud, but it will depend on how fast your internet is.
For more than one all-in-one POS system station, you can use a client-server system and run more than one client in the same place. This is the same as how supermarket POS is set up.
The one-time payment option allows the business to own the system and have access to all its features without having to pay any additional fees or subscriptions.
In BMO, both options allow the business to have access to the system and have the ability to upgrade and add features as needed.
- Easy to use.
- Robust, stable, proven with thousands of current customers.
- Complete system with many modules, HRM, invoicing and more.
- Real-time inventory updates.
- Constant software updates to cater for the environment changes.
- Free constant module updates.
- Quick setup. Just install BMO POS System and key in your BMO POS System log in info.
- Cost-saving. Subscribe our package which cost only a fraction of what is offered in the market.
- Integration. We design our software to work seamlessly with other in-house software, creating a great user experience for our clients.