As you know, POS Terminal cash register is the main operational center for your retail business. BMO’s web based Simple POS Terminal provides sales reporting, complete inventory tracking and inventory reporting.
Inventory system in BMO Offline POS Terminal shows all items on hand in the current POS Terminal location. This will allow your sales person to be well informed on their inventory count and improve sale service.
This tutorial will demonstrate how to use inventory function in Offline POS Terminal.
A. How to create new category
B. How to create new item
C. How to update existing item
D. How to receive item
E. How to search item from item list
F. How to export item
After login into Offline POS Terminal, click on the “Inventory” on the menu bar.
Please click on image to view clearer.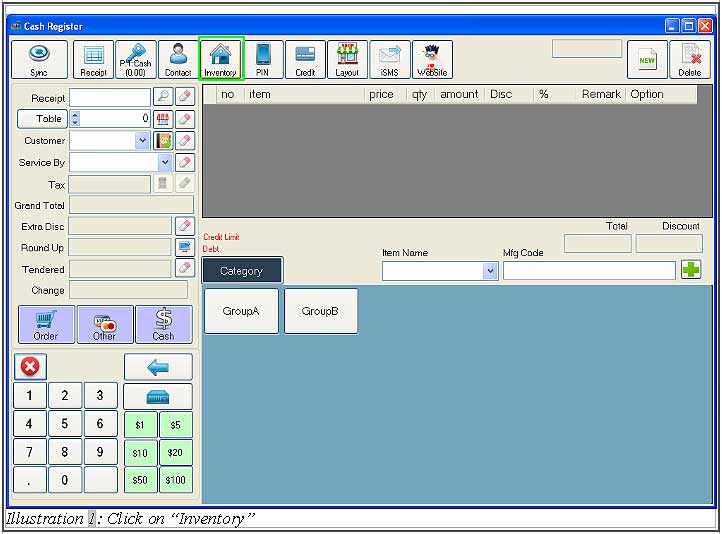
A. How to create new category
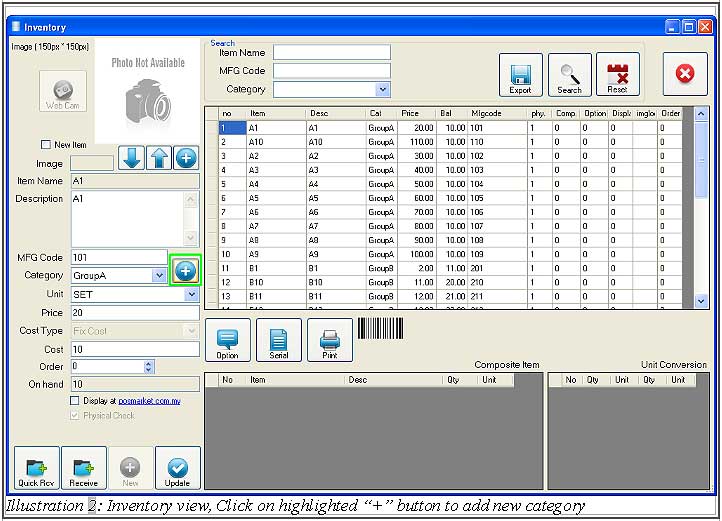
1. To create a new category, you have to click on “+” button as highlighted below.
Please click on image to view clearer.
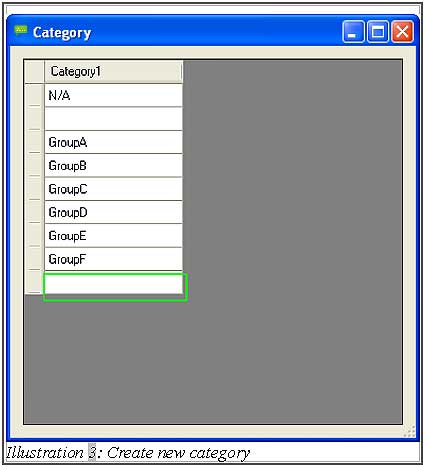
2. As you click on “+” button, category windows will appear as illustration below. To create a new category, you have to click on the row below of “GroupF” . You may click on it, write category name and press enter to insert new category. For example, write “GroupG” after clicked on the last row and press enter. Reminder, user must press enter else it wont save the new category. In addition to that, you can change category name by clicking on existing category. After added, click “x” to close.
Please click on image to view clearer.
B. How to create new item
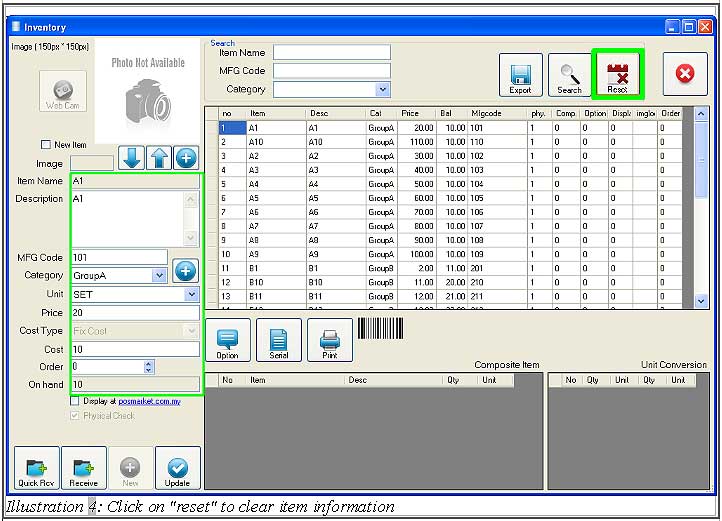
1. You can add the new item via BMO Offline POS Terminal. Firstly, you have to click on “reset” button first to clear item information as illustrated below.
Please click on image to view clearer.
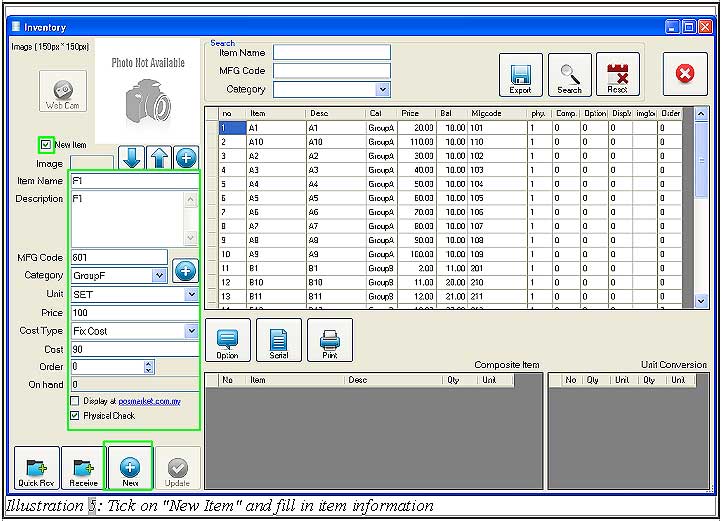
2. Next, tick on “New Item” on windows below. Insert all related details of the item into inventory form. Click “New” once you complete insertion.
| Details of Inventory | Description |
|---|---|
| image | Destination folder of picture |
| Item Name | The item name |
| MFG code | The barcode for item. Scanner can be used to scan this barcode |
| Category | To categorise item. You may add category in offline POS Terminal |
| Unit | The unit for item |
| Price | The price for the item |
| Cost type Fix Cost | The cost is fixed until you change |
| Average cost | The cost will be taken in average of the total cost |
| order | User can arrange item by modifying the number in an order. -2 means the item will not out on cash register. -1 will be the first priority item. 0,1,2, 3 and so on will be ascending according to the item order. |
| Display at posmarket.com.my | The item will be uploaded to posmarket.com.my if checkbox is ticked |
| Physical check | Item cannot be sold if on hand quantity is equal to zero |
Please click on image to view clearer.
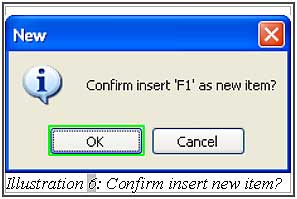
3. A confirmation message will pop up to confirm the new item is to be inserted. Click “OK” to confirm to add item or click “Cancel” to cancel or retype the information and add again.
Please click on image to view clearer.
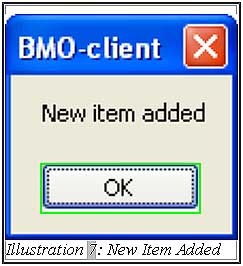
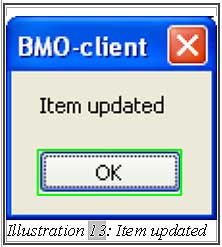
4. A notification will pop up to inform you that the new item has been added successfully. Click “OK”.
Please click on image to view clearer.
5. As the new item is added, the new item will be listed in the inventory list. If you want to start selling this item, you need to receive item. Please refer to D. How to receive item.
Please click on image to view clearer.

C. How to update existing item
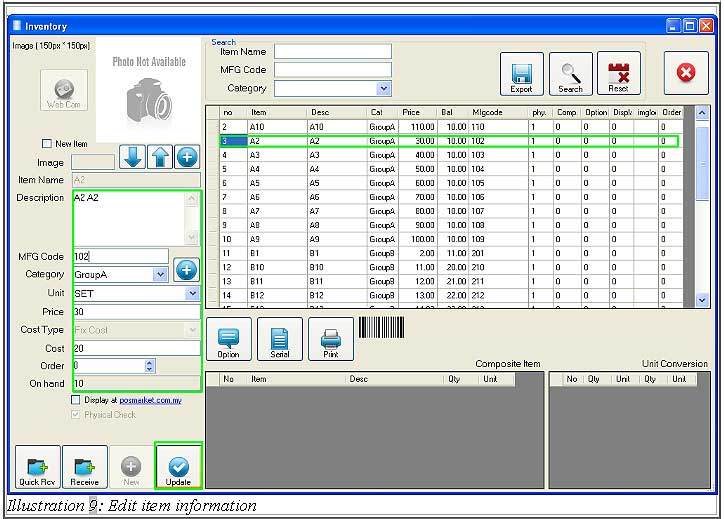
1. If you want to update the details of the item, select the item and edit it. For example the price of the item changes from 1.69 to 1.99.
Please click on image to view clearer.
2. You also can add a photo of item based on the following steps.
2.1 Firstly, click on “+” button as highlighted in illustration below. Please make sure that the photo dimension is not more than “150px * 150px”.
Please click on image to view clearer.

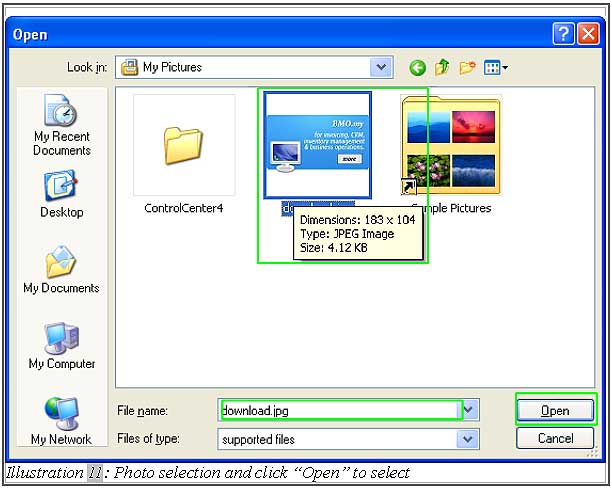
2.2 Select the photo which you want to upload. Then, click on “Open” to select the photo.
Please click on image to view clearer.
3. After that, click “Update”.
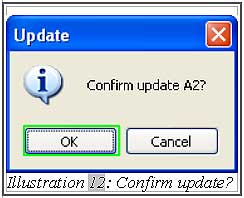
4. A screen will pop up to confirm with you that the item details will be updated. Then, a notification will pop up to inform user that the item has been updated successfully.
Please click on image to view clearer.
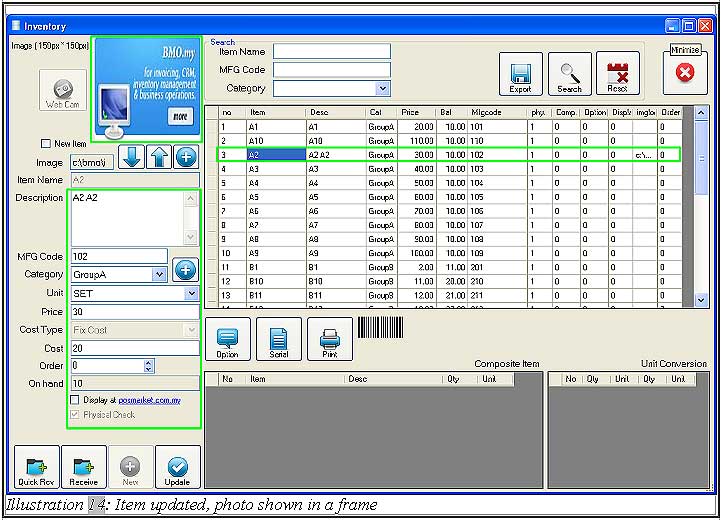
5. After the item is updated, a photo will be shown with the item details when you click on the item. In addition, the item information will be updated as well.
Please click on image to view clearer.
D. How to receive item
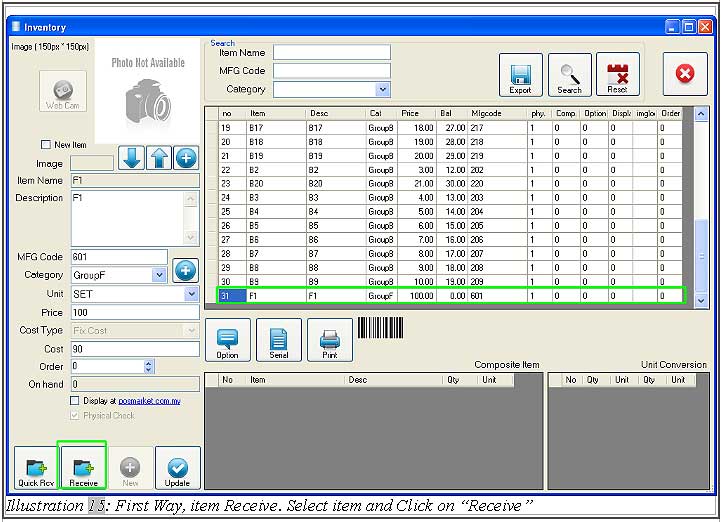
1. There are 2 methods to receive your selected item. You can choose either receive or quick receive.
2. The steps shown below use “Receive” method to receive item.
2.1 Firstly, user need to select the item before making a receive transaction.
2.2 Click on “Receive” button to receive item.
Please click on image to view clearer.
2.3 After you click “Receive”, a screen will pop up to ask you to key in “Receive Quantity”. Click “Apply” after adding the quantity. The cost will be the total amount for received item.
Please click on image to view clearer.

2.4 A pop-up message will inform you that the item is received successfully.
Please click on image to view clearer.

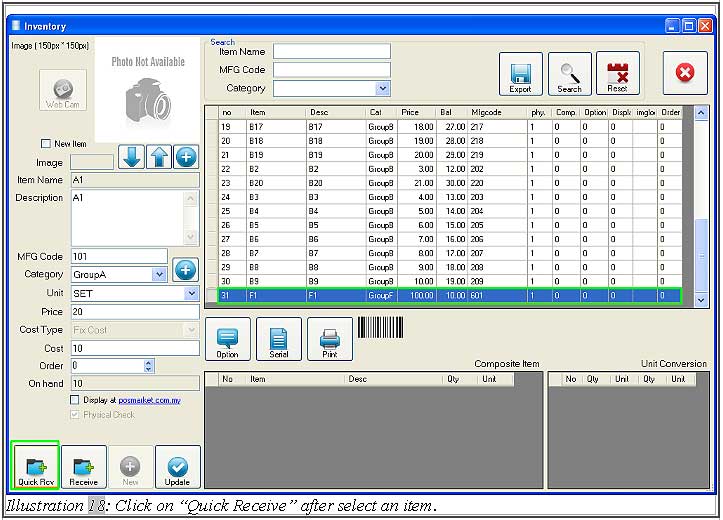
3. The steps shown below use “Quick Receive” method to receive item.
3.1 Click on “Quick Rcv” button.
Please click on image to view clearer.
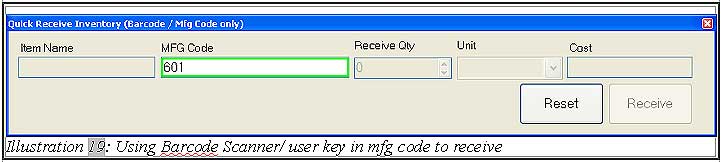
3.2 You can receive item by keying or scanning MFG code of item.
Please click on image to view clearer.
3.3 After insert the item quantity, press “Receive” to receive item. If you keyed in the wrong mfg code, click “Reset” to key in again.
Please click on image to view clearer.

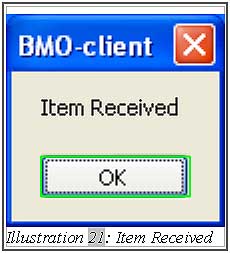
3.4 A message will pop up to inform user that the item is received successfully.
Please click on image to view clearer.
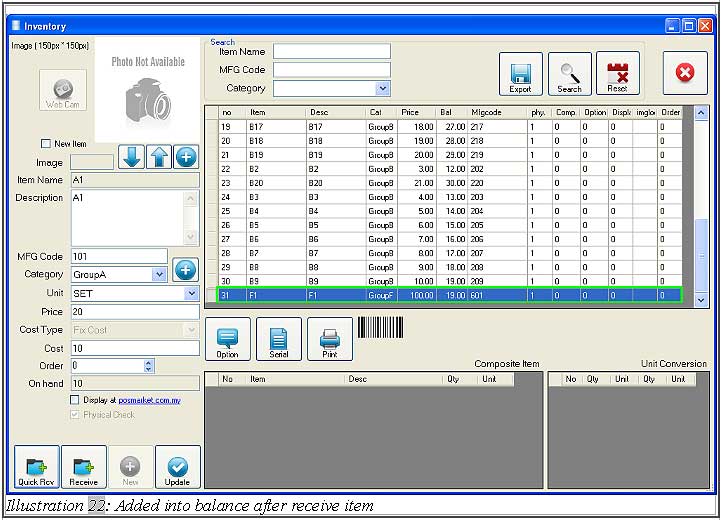
3.5 You can now check out the on hand quantity in item list.
Please click on image to view clearer.
E. How to search item from item list
1. Under search panel, user can search through item name, mfg code or category.
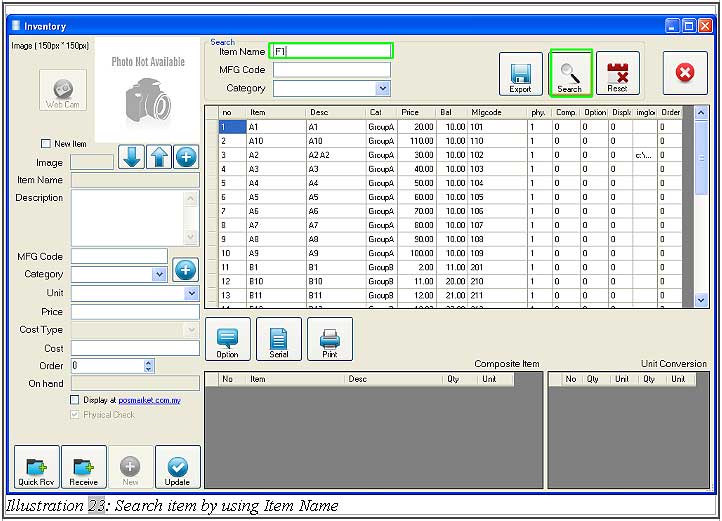
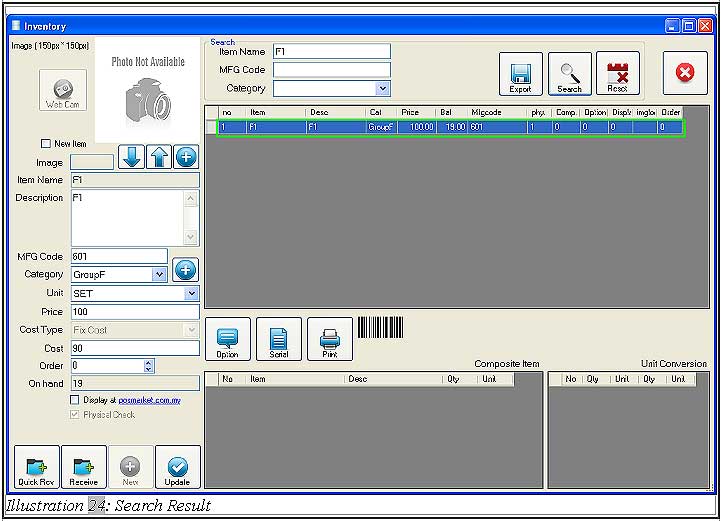
2. You have to key in item name, and click “Search” to search item.
Please click on image to view clearer.
3. Item(s) will then be shown in item list according to the search request.
Please click on image to view clearer.
F. How to export item
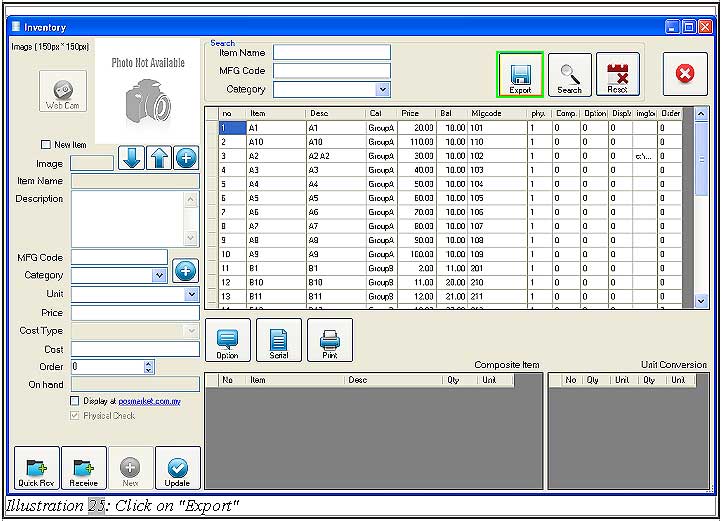
1. You have to click on “Export” button to export inventory list into .CSV file.
Please click on image to view clearer.
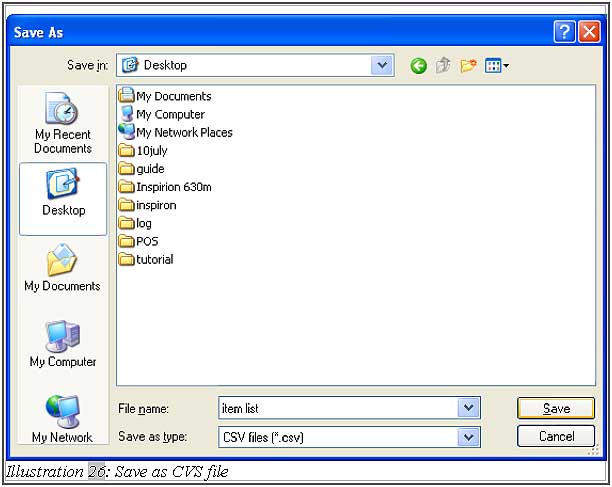
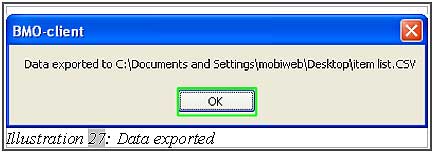
2. Save the document. After clicking “Save”, a message box will be appeared as below. Click “OK” to continue open file.
Please click on image to view clearer.